Last Updated on April 9, 2024 by Real Men Sow
If they are well cared for, bay trees can live up to 20 years in pots and containers. In open ground, however, they can live for as long as 50 years. Bay Trees are herbs, which means they are worth caring for. They also look stunning because of their glossy green leaves and are used in many recipes.
The topiary bay tree can be used to create an evergreen, glossy-leaved piece of art with an edible crop. Even though they are not 100% hardy, Bay trees can withstand a few degrees of frost, especially if they are in a protected area or close to a wall.

What’s The Best Place For Growing Bay Tree?
Requirements in growing Bay Trees in open ground:
- Place where the temperature does not fall below -5°C (32°F). The tree can be damaged if it is subject to windy conditions. Bay trees can grow in lower temperatures, but they should be in protected areas and near the walls of heated buildings.
- The soil should be loose-draining. Heavy clay soils are not recommended. You can improve the conditions by digging out large areas and adding lots of compost and sharp soil.
- Strong winds should not blow on their leaves. They like to be in full sun or partially shaded areas in the UK.
These conditions can be met if you are able to provide them. Also, remember that bay trees can grow up to 12m in height (38ft) if they are not properly trimmed. So make sure you have enough space for planting.
How to Grow Bay Trees in Pots
Bay trees that are grown in containers usually take one of three forms. The three forms of the bush tree, standard, and lollipop. There are also those that have been given topiary and made into a particular shape.
Growing bay trees in containers can do well when regularly pruned into desired shapes or to maintain a certain height and spread. They are excellent evergreen plants and their leaves can be used in a wide variety of recipes.
Where to Put your Bay Trees in Pots
The best place to position your bay trees where it will help you avoid those brown leaves and other environmental issues.
- Your bay tree should not be exposed to harsh winds. This includes both the cold winter winds and the hot summer breezes. This rule may be the most important.
- It should be in a place where it doesn’t need too much water. This is particularly important during spring, autumn, and winter when the natural UK rainfall levels are higher than in summer. Bay trees don’t like roots that are waterlogged. If possible, place the container/pot on supports to allow water to drain as quickly as possible.
- Position the container in an unheated greenhouse, or outside against a wall of your house in winter. This will protect the container from windburn and offer some protection against severe cold weather. Remember that it is a bad idea to bring your bay tree inside a heated home.
- Are you in full sun or partial shade? Make sure you have met the three conditions before you make a decision. Your bay tree will thrive in semi-shade, but they prefer full sun in normal UK conditions.
How To Care For Bay Trees
A potted bush bay tree may have had many shoots growing from its main roots. This can lead to the young tree that you see above the ground. This gives you the opportunity to cut off a few shoots and plant them separately as bay trees. The individual shoots can be used to form another bush, or for experimentation and starting to grow a standard bay tree.
This is done by gently digging into the compost at the base of the shoot. Next, trace the roots as far down as possible. Then, remove the main root from the plant and keep as many stem roots as possible. Then, just plant it in multi-purpose compost at the same depth as before and water it well. The bay stem will quickly grow without any restrictions.
It is likely that your new bay tree will benefit from being potted as soon as you purchase it. A multi-purpose potting soil will work well, especially if the container is heavy. If your pot is made of plastic, you can add weight to it by planting the plant in John Innes Number 2 compost. Before adding compost, drainage is essential.
Only pot up a bay tree in a slightly larger pot than the one before. This is a maximum of 5cm/2in. A bay tree that is potted in too large a space can suffer for long periods of time.
To improve drainage, you can place pot feet underneath the pot’s base to raise it off the ground. This will allow water to drain away from the pot in case of rain. A small amount of long-lasting fertilizer such as bone, blood, and fish, once per month (April through September) is sufficient. To stop the fertilizer from blowing away, sprinkle it on top of the soil.
Only water the soil when it is dry. Re-pot your bay tree every three years into a larger container. This is a good time to remove some of the old soil from the roots and top, and replace it with fresh compost.
Pruning Bay Trees
Bay trees can withstand minor pruning, but they will take up to a year to recover from hard pruning. Mid-summer through late spring is the best time to prune your bay tree. To make sure the stem grows in the right direction, remove any damaged or dead leaves. The shape should be the same. For an untrained bay tree, a maximum height of 135cm/ 4ft 6in would be the ideal height.
Bay trees can often produce “suckers” from below or above the soil’s surface. If you grow them in a bush-like shape, this is fine. They will expand the plant’s base which can be beneficial. These suckers won’t look great if you grow standard bay trees with a bare root. If they are above the soil line, you should trim them off with a pair of sharp secateurs. You can remove any soil from the sucker’s base and trim it as low as possible. In a few months, the sucker might reappear so do it again. It takes only a few attempts to keep the shoot pruned. However, the pruned suckers can also be used to plant new bay trees.
When To Prune Bay Trees (Lollipop or Standard Shape)
Because the process can take three to four years, there is not much information online about how to prune bay trees into a lollipop shape. To improve the shape, trim the stems to just two shoots. This will keep the top of the tree rounder.
A young, single-stemmed bay tree can be pruned to grow into a standard or lollipop tree. First remove all shoots from the main stem. Any shoots that appear as the bay tree grows taller should be removed, usually from the area between a leaf or the main stem.
The stem should be about 90cm/ 3 feet in height after two to three years. Four to six top shoots should be left from the main stem when the tree reaches the desired height. These shoots will form the bushy top of the lollipop trees. To stop the tree from growing higher, trim the top of the main stem.
After each shoot has produced two to three side shoots, trim the tips. To encourage dense tops, make sure to prune the buds so that they face inwards.
Standard bay trees can snap in high winds. A cane will be needed to support the main stem. Without support, your tree may soon begin to fall to one side during the early stages of growth. A cane is required at this point. It is not necessary to support the tree (the stems of young trees are flexible), but to ensure that the trunk stays straight and upright. The support cane will get shorter as the tree grows and will have to be replaced with a longer one. You may need to repeat this process three to four times. As the tree grows, tie the main trunk to your support cane at various points.
Growing Bay Trees For Lollipop Shape Maintenance
A bay tree that is shaped like a lollipop will lose its shape if it isn’t kept trimmed. There will be two things that will happen. First, some stems will become longer than others and the ball shape will change. The second thing that will happen is that the ball shape will change and the stems will expand more freely. This is fine, but some people prefer the same shape as when they purchased the plant.
You can do this by using a pair of secateurs to prune the stems twice or three times per year. You can trim them to the desired length to keep the shape. It will be easy to see that there aren’t many stems you need to trim if you do it often. However, it will encourage the growth of other stems which will increase the density of your shape.
Always prune a stem to an inward-facing bud when pruning a stem. This is even if it means that it may be slightly shorter. The bud below the cut will start to grow inwards, rather than outwards. This helps keep the lollipop shape.
Cooking with Bay Leaves
Bay leaves can be found in supermarkets and shops in dried form. They retain their flavour for approximately six months. Keep bay leaves in an airtight container in a dark, cool place to preserve their flavour.
Freshly picked bay leaves are stronger in flavour. If you’ve grown them yourself, you will know exactly what chemicals were used during their cultivation. It can be used as a base for many sauces, soups, and meat dishes.Hang bay leaves by cotton, in a dry area. After drying, they will be dry enough to store in a jar or plastic bag.
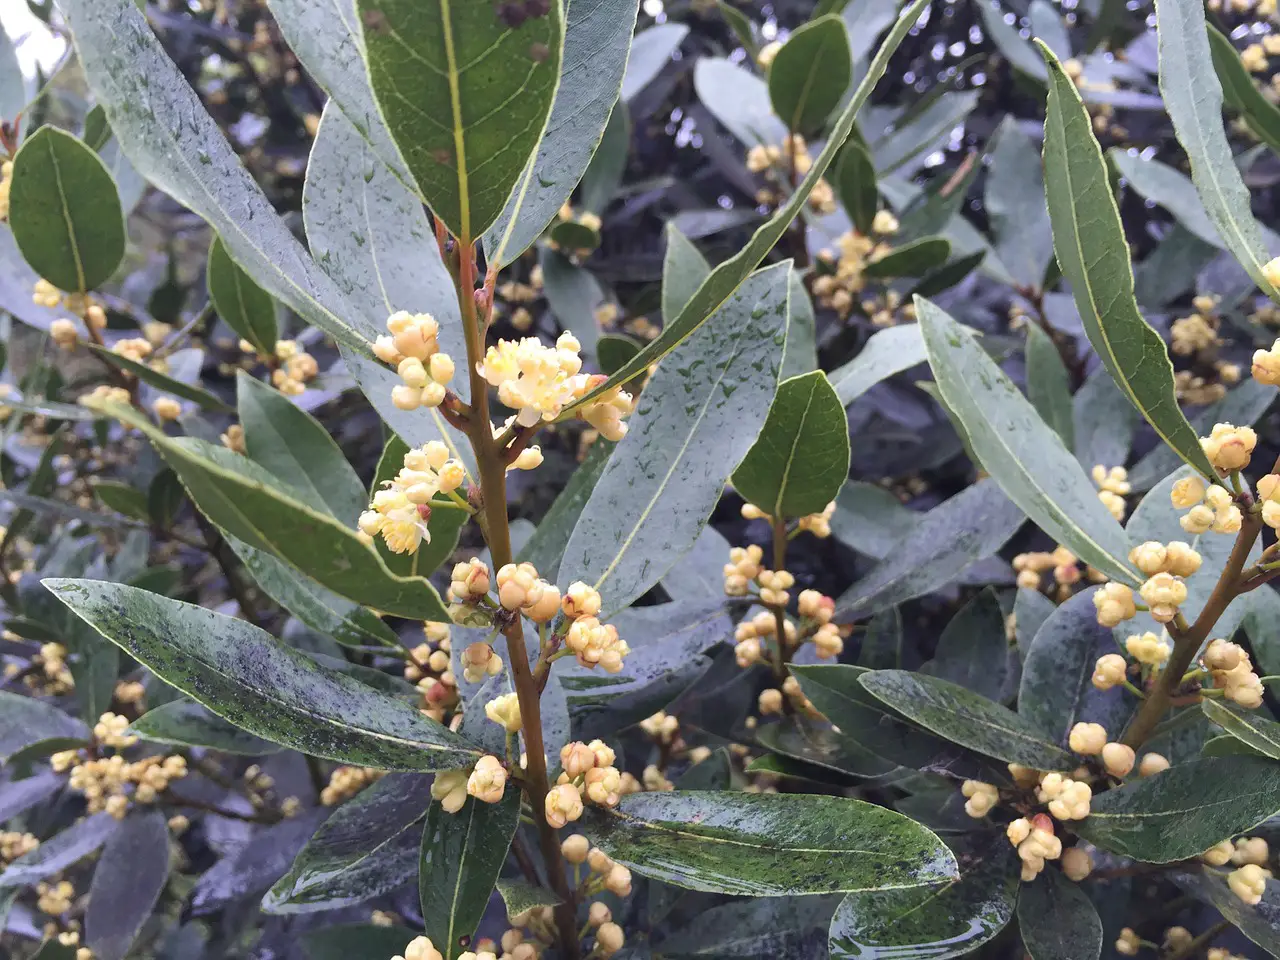
Do Bay Leaves have Flowers
This question is often asked and the answer is simple: yes. The bay tree’s flowers are most prolific in April/May, but only on mature trees. Flowers are not produced by younger bay trees. They are about five pence in size. They are unlikely to impact the growth of a mature bay-tree.
There are female and male forms. Autumn is when the difference is most evident. The berries are produced by female forms, which contain seeds. However, the berries are not usually produced by male bay tree forms.
Bay Tree Leaves and Wood Chips as Mulch?
Bay tree leaves and wood are generally considered acidic. They also take a while to compost well. It’s best to not use them as mulch or on a compost pile. They are fine in small amounts, but they should not be used as the main ingredient of compost or mulch.
