Last Updated on April 8, 2024 by Real Men Sow
The gardener’s essential toolkit includes cold frames. They can be used to plant seedlings in the spring, carry on vegetable cropping well into winter, and to harden tender plants. They are the best friends of the gardener and you don’t have to spend a lot of money to buy one.
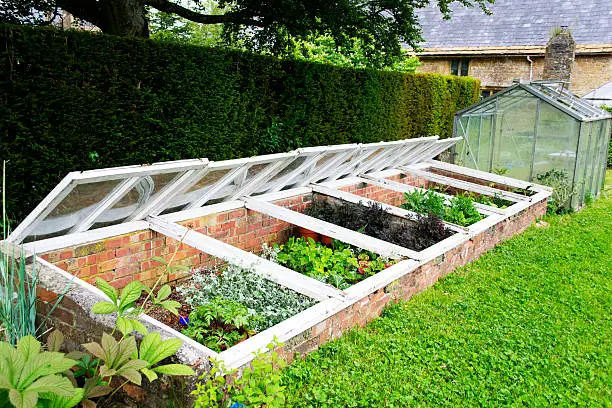
Homemade Cold Frames
A cold frame is simply an ordinary box frame with a transparent lid (also called a “light”) on the top. Although the frame is usually made from wood, it can also be made of other materials like bricks or blocks. The transparent lid allows sunlight to enter the frame, trapping heat inside and protecting plants from adverse weather conditions.
Should I Use Wooden Cold Frames
A wooden cold frame is an easy DIY project due to its simple structure. You can use salvaged windows to make a lid. The frame will be measured and cut to your specifications. To get maximum sunlight and warmth, slope the lid towards the sun at midday. Place your cold frame directly on the soil, concrete slabs or slabs.
Materials and Tools For Cold Frames
The Lid
A cold frame can be made from an old window or salvaged windows, or a clear door such as a door for a bathroom. You can also use twin wall polycarbonate or sheet glass to make a cold frame. Strong hinges are required to attach the lid to the frame. If you want, you can add handles.
The Frame
Cut lengths of pressure-treated lumber to match your lid or lids. To maximize sunlight and reduce rainwater, ensure that the cold frame’s back is at least one board higher than its front.
We are using four boards at the back and three at the front in our project. Seven shorter boards make up the sides. Cut seven shorter boards diagonally at the seventh length to match the slope.
Attach the boards to four corner posts that match the heights of the back and front boards. Different lengths of two battens would allow you to open the lid during sunny days.
Tools
You will need wood screws, a drill, and a screwdriver to put together the frame.
Making Cold Frames
Start by attaching the sideboards to the corner posts using two screws at each end. It will be easier to drill pilot holes than to screw the boards in place. Screw the narrow end of each triangular top board vertically into the board below. Screw the back and front boards into their corner posts exactly in the same manner.
Now you can attach the lids to your frame. Place the lid on the frame until it touches the back. Screw in your hinges. Some lids have multiple hinges because they are longer.
Only thing left to do is to secure the lid supports in place, make sure to put them inside the frame. One on each side and one on the front. These should be loose enough for the lid to move up and down at various heights. To make it easier to open, you can attach handles to the lid. Now your cold frame is ready for use!
